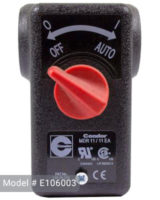
The pressure switch is one of the most important parts of an air compressor. It controls the pressure by turning the compressor motor on and off. Together with the pressure gauge, it determines whether there is a need to deliver pressure in the reservoir or receiving tank when the content gets too high or low. When the pressure switch gets broken, there is a tendency for the entire compressor to stop working. Fortunately, there are a lot of replacements available in stores that you can purchase at an affordable cost. However, how do you wire or install it to your air compressor?
Materials Needed in Wiring
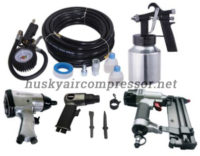
You only need a few things to wire your pressure switch. Of course, your air compressor should be present. Make sure that the air pressure switch that you bought is compatible with the model of your air compressor. Some pressure switches do not fit and are not designed for a certain model. Read the manual of your air compressor to know what type of pressure switch to buy.
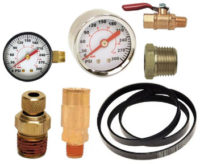
You will also need a Teflon tape which will serve as your adhesive for the wires. It is not required but is advisable to use a short pipe nipple (about ¼ inch in diameter) to conduct the air from the receiving tank to the pressure switch. Other materials needed include a crescent wrench, wire strippers, and screwdriver.

Steps in the Air Compressor Pressure Switch Wiring
1. First, ensure that the air compressor is turned off and that no electrical power is running from a source and feeding the machine. In the storage tank of the air compressor, you will find the pressure switch. Typically, there must be no valve installed between the air storage tank and the switch but there should be a pre-installed 1/4 inch diameter pipe. These settings mainly depend on the model of air compressor that you have but these are the most common.

2. Next, seal three rounds of Teflon tape over the male pipe threads. Make sure that the tape is neatly placed and will not block the path of air. If this is not properly done, the tape might get blown off by strong air delivery and be displaced to a place where it is not needed. You may now screw the female fitting of the pressure switch onto the pipe nipple. Use the crescent wrench to tighten the screw. You do not want something that can be easily removed and cannot withstand extreme pressure. However, don’t make it too tight to avoid removing the iron cast. Remove the cover of the pressure switch.
3. Upon removing the cover of the switch, you will now see its interior. You will find small copper discs. Take note that a set of discs has a corresponding screw connector. You will also see a set of four contacts which are connected together electrically. One set will be used for each wire that needs to be switched. Using the wire stripper, strip two wires coming from the power source and two wires going to the compressor motor. As with usual wiring, remove a small inch of the plastic insulation to bare the copper wire underneath.
Connect the two wires from the power source to the screw terminals on the outer part of the contacts (tagged as ‘line’) using the screwdriver. The other two wires going to the compressor motor should be connected to the screw terminals on the inner part of the contacts (tagged as ‘load’). This step also depends on the type of VAC circuit that you have. A 240 VAC feeder circuit would differ from a 120 VAC circuit because the latter would require that the neutral wires be connected to the same set of screw terminals on the contact. After connecting the wires to the screw terminals, connect the bare copper wire (green wire) that you revealed earlier to the green screw that may be found on the metal frame of the pressure switch.
4. Finally, replace the cover over the pressure switch that you removed earlier. Connect the air compressor to a power source. Turn the pressure switch on. You should now be able to control the pressure of your air compressor as necessary.
Things to Remember
For your own safety, the pressure switch that you will be using should be rated accordingly with the specifications of your air compressor. The air system and electric motor are sensitive parts so you would want something that would work well with them.
If you are a newbie in wiring, it is recommended to ask for assistance during the first time that you will replace or install your pressure switch. There are certain measures in electrical wiring that need to be practiced. If you are not aware of these steps, call a professional who can help you.
Make sure that you will buy a high-quality pressure switch that is made of durable materials. Because the pressure switch can be damaged easily, it is important to invest on something that will last long. Also, do not adjust the factory settings of the pressure switch that you bought. Those settings were pre-set for a reason. Any change can cause significant alterations on how it works.
Do not wire directly to the motor. The contacts and screw terminals were designed so that the wires will be connected to them. Bringing power directly to the motor can cause it to run continuously even when the tank is already full. Overheating will occur and eventually, the air compressor will get broken.
Do not forget to test the pressure switch after you replace or wire it. It might seem that you did all the steps correctly but somewhere in the middle, you might have forgotten to connect one thing to another. Test the switch several times to confirm that the wiring is a success.
The model of your pressure switch may have a different structure or markings than those described in this article. As long as you know the principles, you should be able to adjust accordingly and identify all the right parts.

Where can I find the manual for a Husky VT6314?